
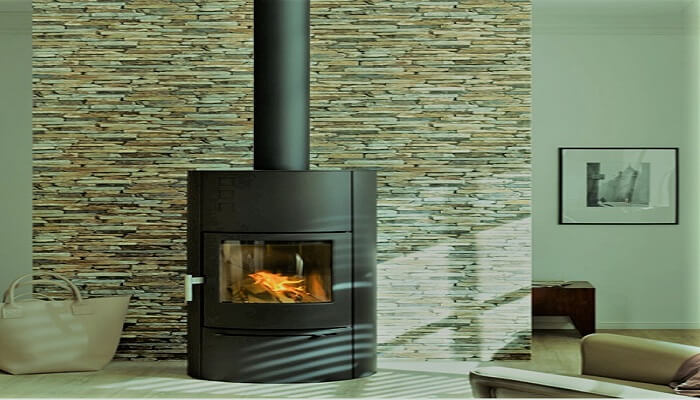
Installing Wood Stove Pipe Through a Wall or a Metal Roof (Step by Step)
Disclosure: As an Amazon Associate, I earn from qualifying purchases. Learn more
Installing a wood stove pipe through a wall or a metal roof requires careful planning and execution to ensure proper ventilation and safety. To accomplish this task, you can use a wood stove pipe through a wall kit or follow specific installation steps.
When installing a wood stove pipe through a wall, you need to determine the appropriate location and select a suitable wall thimble. The wall thimble serves as a passage for the pipe and protects the surrounding combustible materials. It is essential to follow the manufacturer’s instructions for the specific kit or materials being used.
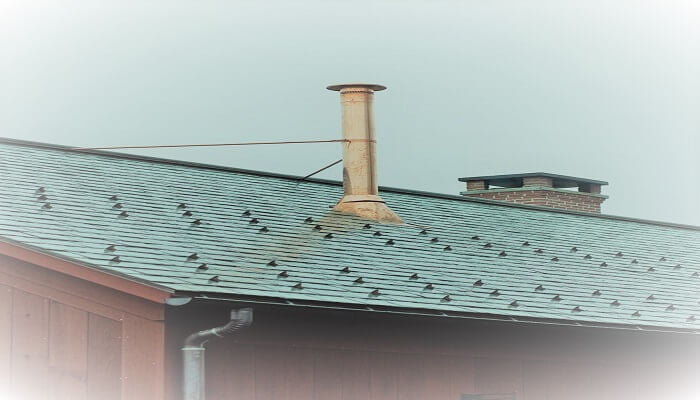
To install a wood stove pipe through a metal roof, you will need a metal roof flashing designed for this purpose. The flashing creates a watertight seal around the pipe and prevents leaks. Again, following the manufacturer’s guidelines is crucial to ensure a proper installation.
Before starting the installation, it is advisable to consult local building codes and regulations to ensure compliance and obtain any necessary permits. It is also recommended to have a professional chimney or stove installer inspect and approve the installation to guarantee safety and adherence to regulations.
Proper installation of the wood stove pipe through a wall or a metal roof involves securing the pipe, ensuring clearances to combustible materials, and providing proper insulation or sealing to prevent heat loss or condensation. Following best practices and using high-quality materials will help ensure a durable and efficient wood stove installation.
Regular maintenance and inspection of the wood stove pipe and chimney system are essential to ensure optimal performance and safety. Cleaning the pipe and chimney regularly will help prevent creosote buildup, which can pose a fire hazard.
How to Install a Wood Stove Pipe Through a Wall?
Two things should be confirmed before installing a wood-burning stove pipe. First, make sure there are no flammable substances in the vicinity that could cause a sudden fire. Second, make sure that the house in which you are going to install the stove pipe is allowed to be built in that building. Now follow the steps-
Step- 1
Select the appropriate location for your stove pipe installation. Try to locate it 3 feet above the wall from the stove.
Step- 2
Clearance is an important issue for stove pipes. This will be determined by the type of pipe being used. It can be less than 18 inches for single-wall pipes and less than 6 inches for double-wall pipes. And if you want to install your pipe through the outer wall, you need a one-foot clearance between the pipe and the ceiling and floor.
Step- 3
In this step, you will start removing the wall using an angle grinder and use the necessary personal protective equipment at this time. You can use a saw to remove any insulating material by hand.
Now you also need to sketch your template using long screws to remove the extruded wall. You use a drill to drive the screws through the exterior walls of the house.
Step- 4
Once your wall is ready you will be attaching the wall flap and chimney pipe. Then tee support and galvanized tee. Someone will help you when it is attached and screwed into position.
Step- 5
Now install the chimney pipe. It’ll run through your wall and connect the outer chimney pipe to the internal wall. This allows you to fit it into the interior wall.
Step- 6
In the next, final step, the chimney pipe will be attached to the thimble of the inner wall. The outer chimney is like a pipe bracket to which the thimble is mounted and screwed to the wall. Now connect the stove pipe to the chimney using the chimney connector and transfer it from the high-temperature chimney pipe to your single or double-walled stove pipe.
How to Install Wood Stove Pipe Through Metal Roof?
Working with metal roofs can seem a bit complicated. The work is a bit subtle. To install the wood stove pipe where you need to cut a hole to the size, apply it to flash, and secure the pipe perfectly.
Don’t place the stove pipe along the outside wall of your home. It never works efficiently. A wood stove can easily heat a room properly if pipes are installed along the interior wall of the house.
Step- 1
Install the stove at your chosen location, if not already installed. Take the chimney pipe and place a part of the chimney pipe in the stove connection. In choosing a pipe it is important to keep in mind that a longer unit can provide a sufficient amount of draft for a wood stove than a short one.
Step- 2
Now take a plumb bob from the ceiling to help mark the center point of the roof sheathing plywood pipe, and then drill the pilot hole where you made the mark. Be sure to make holes for the chimney to pass through the metal roof.
Step- 3
With access to a drawing compass, draw and create a diameter by marking the diameter of the outer surface of the metal roof of the hole you need in the chimney. Extending out a few inches of pipe is a good experience. There is no threat of fire even if there is any flammable material near the chimney.
Step- 4
Use a combination blade to make holes in your roof as well as plywood with your jigsaw in this step. Now take the flashing and place it on top of the hole you made. Move the flashing down a few inches and draw a line with a pencil where the top of the edge is. Then cut where you put the line. It is best to use a sharp snip for this.
Step- 5
After cutting the line you can place the top edge of the flashing under the roof and roofing paper. Now slide forward through the hole in the chimney pipe. Run a half-inch exterior grade with the roof slightly raised.
It should go a little further upwards where the end of the roof meets the flashing surface. Do this again at the bottom of the perimeter of the base and press down to comply with the flashing.
Step- 6
Follow the instructions and carefully insert the chimney through the hole in the roof with the flashing collar. Place the bottom or other end of the chimney on the flange of your wood stove.
Step- 7
This is the last step. Re-check to make sure you haven’t done anything wrong in your previous job. Then install the chimney cap according to the instructions. Place it on each side of the flashing with a little chalk, and cover it with any gaps in the collar to prevent any moisture.
Conclusion
If you’re not sure about how to install a wood stove pipe through a wall, take the time to call in an expert. Wood stoves are safe and efficient if installed correctly but any power tool is dangerous when used improperly. Be sure to read the manufacturer’s instructions before starting this kind of work so that your installation goes smoothly without risk or damage.
FAQs
Can I install a wood stove pipe through a wall?
Yes, you can install a wood stove pipe through a wall by using a wall thimble and following the manufacturer’s instructions. The wall thimble acts as a protective passage for the pipe, ensuring proper ventilation and safety.
Is it possible to install a wood stove pipe through a metal roof?
Absolutely. You can install a wood stove pipe through a metal roof using a metal roof flashing designed for this purpose. The flashing creates a watertight seal around the pipe, preventing leaks and maintaining the integrity of the roof.
Are there any specific permits required for installing a wood stove pipe through a wall or metal roof?
It’s advisable to consult local building codes and regulations regarding permits for installing a wood stove pipe through a wall or metal roof. Compliance with these regulations is essential to ensure safety and adherence to legal requirements.
Can I install a wood stove pipe through a corrugated metal roof?
Yes, it is possible to install a wood stove pipe through a corrugated metal roof. However, extra care must be taken to ensure a secure and watertight installation. Using a metal roof flashing designed for corrugated roofs and following manufacturer instructions is important.
How do I maintain the wood stove pipe and metal roof flashing after installation?
Regular maintenance involves inspecting the wood stove pipe for creosote buildup and cleaning it as needed. Additionally, periodically check the metal roof flashing for any signs of damage or wear. Promptly address any issues to maintain the efficiency and safety of the wood stove installation.
Can I install a wood stove pipe through an exterior wall?
Yes, it is possible to install a wood stove pipe through an exterior wall. However, careful consideration must be given to the clearances, insulation, and protection of combustible materials. Following manufacturer instructions and local building codes is crucial for a safe installation.
Relevant Post:
Discover New Articles: See Our Latest Updates